
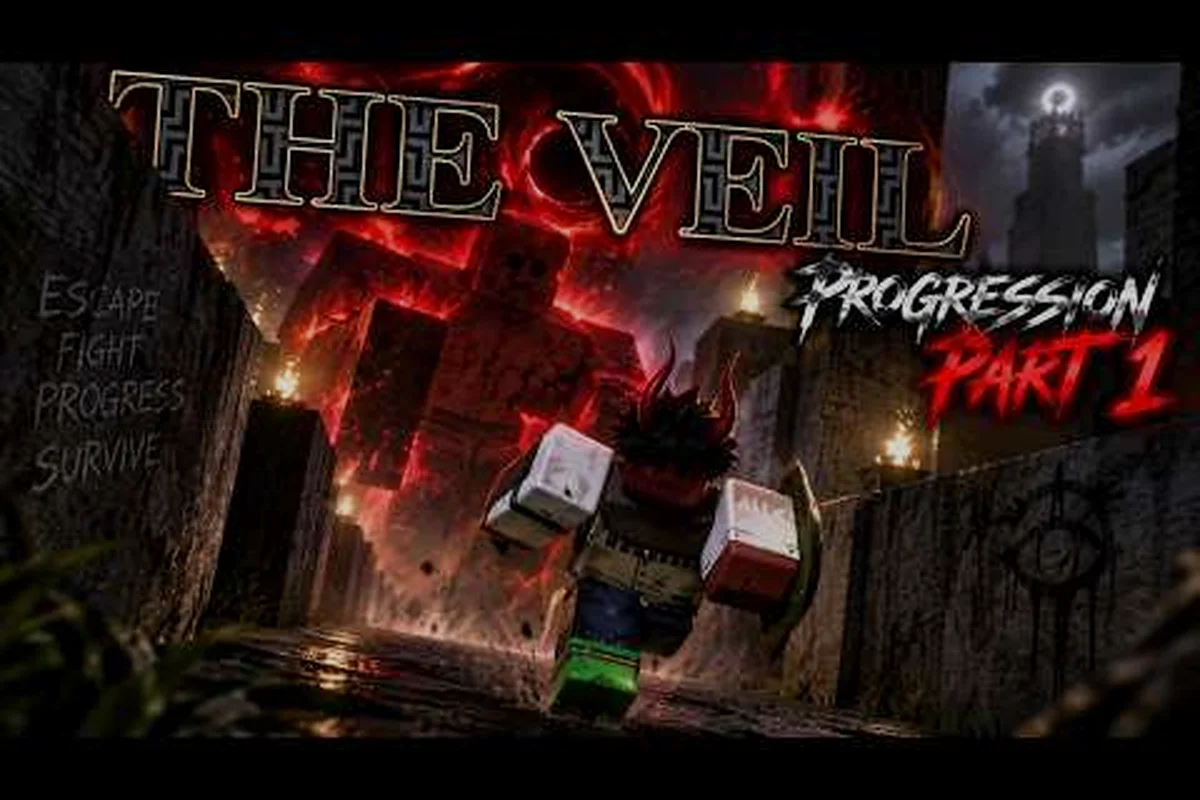
The Veil all locations break down into three named regions — The Glade, The Maze, and The Pale — each with its own rules, daylight schedule, and reward economy. Knowing which zone serves what purpose, and the exact Obelisk that bridges them, is the single biggest shortcut to cutting your first clear from twenty hours of aimless wandering to a tight progression loop that actually scales into endgame. This tour walks every region in order, flags the entry conditions most players miss, and lays out the loot profile each area is designed to feed.
The Veil Region Overview: Glade, Maze & Pale at a Glance
The Veil's world map is split across three distinct regions, connected by Obelisk fast-travel points, and each region behaves like a different game mode rather than a contiguous biome. According to the official The Veil page on Roblox, The Glade is the safe surface hub, The Maze is the night-only dungeon, and The Pale is the Primordial Era endgame anomaly zone — but those one-liners hide a lot of mechanical difference that matters once you start pushing story.
The table below breaks down what each region actually delivers in practice — for example, The Glade hands out Fire Essence and starter Silver on a flat difficulty curve, The Maze gates Ichor and Sins behind sanity-drain night runs, and The Pale locks Mythic-tier materials behind Primordial Era modifiers and boss-rush clears — so you can match your daily session to the region that actually pays out, instead of wasting a day farming The Glade for drops it simply doesn't drop.
| Region | Day/Night Rule | Primary Role | Main Resources | Difficulty Curve |
|---|---|---|---|---|
| The Glade | Always accessible | Surface hub, vendor city, race/class trainer | Silver, basic Gems, Fire Essence (low tier) | Starter — no enemy aggro |
| The Maze | Night-only dungeon | Mid-game progression dungeon | Ichor, Offerings, Sins, Epic drops | Mid — sanity drain, heavy mob density |
| The Pale | Endgame story gate | Primordial Era anomaly, boss-rush zone | Mythic-tier materials, race-locked crafting | Hardest — Primordial Era modifiers |
Players who treat the three regions as a single connected overworld usually get stuck, because the day/night cycle and the Obelisk system are the real map. Cross-referencing with our The Veil night cycle explainer confirms the cycle is the only way to gate The Maze, and the Obelisk system is what physically moves you between regions without a long run-back.
What Each Region Is Actually For
The Glade is where you learn your class, reroll your race, talk to vendors, and stash loot. Nothing in The Glade shoots back at you, which is why most players camp there for far longer than they should — it feels safe because it is safe, and the temptation to skip The Maze entirely is real. Resist that temptation, because The Glade's vendor economy is calibrated around drops you can only get inside The Maze and The Pale.
The Maze is the workhorse region. It opens at night, it closes at dawn, and the mobs inside hit hard enough that your sanity bar becomes the real health pool. According to the developer group, BlackstarDW Studios' Roblox community page, the studio tunes Maze spawn rates around the night timer rather than player count, so a quiet server still respawns elites on schedule.
The Pale is endgame, and "endgame" here means the Primordial Era modifier stack: tougher elites, fewer safe corridors, and boss-anchored rooms that gate story progress. You will not be allowed to enter The Pale on day one — it sits behind a story push that most players reach only after the 10th- or 15th-prestige milestone.
The Glade Location: Safe Hub, Vendors, and Where New Players Should Camp
The Veil Glade location is the surface hub every player spawns into, and it is the only permanently safe zone in the entire game. There are no aggressive mobs in The Glade, the vendors never close, and every Obelisk you need to fast-travel sits in a fixed, named landmark inside it. If you have played any survival-RPG with a central town, the design language is identical: a circular safe ring, several vendors around the perimeter, and exits that lead into the dangerous biomes.
The Glade's main landmarks, and what each one actually does, are listed below — and understanding their layout matters more than most new players realize, because the distance between the Central Obelisk and the Vendor Row determines your average inventory-management downtime per Maze run. Players who camp near the Enhancement Bench and Class Trainer can refit a fresh build, offload Fire Essence to the Vendor, and re-activate the Obelisk to the Pale in under 30 seconds, while players who spawn by the perimeter exits waste real time crossing the safe ring on every loop. Treat the Glade as a rotation, not a destination: anchor your routine to one landmark and chain the rest from there.
| Glade Landmark | Function | Best Use |
|---|---|---|
| Central Obelisk | Fast-travel hub, opens after first activation | Jump to Maze/Pale Obelisks without running |
| Class Trainer | Unlocks Verdant, Gladiator, Cyst Disciple, Cultist, Marauder, Sky Sentinel, Crusader, Nightshade | Pick first class here, hybrid combos later |
| Race Reroll NPC | Reroll among the 10 documented races (Human, Goblin, Skeleton, Hiveling, Wraith, Mushling, Veilborn, Gemhead, Obelite, Underling) | Burn Silver until you roll the race you want |
| Vendor Row | Buys Fire Essence, sells Gems, accepts Offerings | Offload Maze loot before inventory fills |
| Enhancement Bench | Upgrade gear rarity using Ichor + Silver | Park here between dungeon runs |
The Glade is also the only place where Enhancement and Enchanting services are stable. Both systems consume Ichor, which is a Maze-only drop, so most players develop a loop of "clear Maze → return to Glade → enhance → re-enter Maze" that becomes the backbone of mid-game progression. Our The Veil obelisks locations guide goes deeper on which Glade Obelisk you should activate first, because the order in which you unlock fast-travel points actually changes your farming efficiency.
Glade Vendors and the Silver Economy
Silver is the Glade's soft currency, and it drops from nearly every mob in The Maze at a low but reliable rate. The vendors in The Glade accept Silver for Fire Essence (a consumable resource), low-tier Gems, and a small set of cosmetics. The Glade does not sell Ichor, Offerings, or Sins — those are Maze-bound, which is why the Glade's economy is intentionally limited.
A common rookie mistake is hoarding Silver in the Glade and waiting for "something better to spend it on." The correct play is to spend Silver immediately on Fire Essence and Gems, because the Glade vendors restock on a real-time timer and you can always farm more Silver on your next Maze run. The Glade's economy is a sink, not a vault.
The Veil How to Enter the Maze: Night Cycle, Obelisk Trigger, and Prep
The Veil how to enter the Maze question trips up almost every new player, because the entry is gated by a mechanic — the night cycle — that the game does not explain in plain text. The Maze only opens during the in-game night phase, and the transition is not a smooth fade; the entire region despawns and respawns with a hard cut when the cycle flips. If you try to enter The Maze during the day, you will simply not find the entrance, and you will think the Obelisk is broken.
The full procedure for entering The Maze in The Veil is broken down across the five rows in the table below, covering the night cycle wait, the Obelisk activation from The Glade or any unlocked fast-travel point, the threshold crossing, sanity monitoring, and the extraction loop back to the Glade vendor. Each row is annotated with the most common failure mode at that step so you can self-diagnose if a run goes wrong, and the sequence is designed to be repeatable for farming the Maze's exclusive loot tables tied to the pale guide progression.
| Step | Action | Common Mistake |
|---|---|---|
| 1 | Wait for the in-game clock to flip to night | Trying to enter at midday and concluding the door is bugged |
| 2 | Activate the Maze Obelisk from any unlocked Obelisk | Running to the Maze on foot instead of fast-traveling |
| 3 | Cross the threshold before the night timer expires | Overfarming in The Glade and missing the window |
| 4 | Watch sanity bar, not health bar | Treating HP loss as the danger instead of sanity drain |
| 5 | Loot, extract to Obelisk, return to Glade vendor | Tunneling deeper when sanity is already red |
The night cycle is the only entry condition; there is no quest flag, no item, no level gate. If you can see the night sky and your Obelisk is unlocked, you can enter. Our deeper dive on how the night cycle interacts with Obelisks shows that the night window is generous enough for two or three full clears, but the second half of the night is when elite density peaks.
What to Bring Into The Maze
The Maze does not let you bring your Glade buffs with you — vendor-bought Fire Essence consumables stay in the Glade inventory, so what you bring in is your gear, your class kit, and whatever you can carry. Most players bring a hybrid class combo for The Maze, because pure single-class builds run out of utility when the sanity drain starts compounding. The class combinations are formally Hybrid picks of two base classes (Verdant, Gladiator, Cyst Disciple, Cultist, Marauder, Sky Sentinel, Crusader, Nightshade), and the community has settled on a few favorites for Maze clear speed, but the developer has not published a tier list, so treat any tier claim as community-tested rather than official.
The Veil Maze Map: Layout, Landmarks, and Sanity Mechanics
The Veil Maze map is the most-confused region in the game, and the confusion comes from the fact that it does not look like a literal labyrinth. The Maze is a walled dungeon with looping corridors, named anchor rooms, and an elite spawn pattern that rotates with the night cycle. There is no "center" to the Maze in the way a roguelike has a boss room at the core — instead, The Maze has anchor rooms that serve as Obelisk-adjacent safe pockets where the sanity drain pauses.
Each anchor room listed below ties back to the Obelisk spawn system that gates The Maze entrance, and the table is ordered to match the path most players take on a first clear: you respawn at the Entry Vestibule, push west into the Bell Chamber, bank Ichor at the southern Pools, cash it in at the Offering Shrine, and only then detour toward the hidden Ancient Bones Arena — a route that also lines up with how the community has mapped the shortest path to The Pale.
| Anchor Room | Approximate Position | Function |
|---|---|---|
| Entry Vestibule | Maze Obelisk side | Respawn on death, fast-travel exit point |
| Bell Chamber | Mid-Maze, west loop | Community-named "Bell Boss" encounter; not an official boss |
| Ichor Pools | South quadrant | Highest Ichor density, elite Ichor Wraith spawns |
| Offering Shrine | Northeast corner | Trades Offerings for a buff, resets weekly |
| Ancient Bones Arena | Hidden, off the main loop | Community-named rare night encounter, not an official boss |
The "Bell Boss" and "Ancient Bones" labels are community nicknames, not official names — the developer has not published a named sub-boss for either encounter, and the documented 12-boss roster (The Stormcaller, The Beholder, Smelter Demon, Hiveling Titan, Goblin Warlock, The Puppeteer, The Festering Wound, The Crowned Nothing, The Masquerade, The Unfinished, The Cell of Life, plus the Crowned Nothing) does not include a Bell-named boss. Treat the nickname as a landmark, not a lore label.
The Maze map is small enough that most players memorize it within two or three clears, but the spawn rotation means the same corridor can hold three elites one night and zero the next. According to community data, the Ichor Pools and the Offering Shrine are the only two anchor rooms that respawn elites on a fixed schedule; the rest of the Maze fills with trash mobs that scale with your Prestige tier.
Sanity Bar vs Health Bar
The sanity bar is the Maze's defining mechanic, and it is the reason a tanky build with low max HP can still die in two hits. The sanity bar drains when you stay inside the Maze past a certain threshold, when you take damage from elite abilities, and when you interact with cursed objects. The bar does not refill from healing potions; it only refills by exiting the Maze or by interacting with a specific anchor room.
Players who treat the sanity bar like a second HP bar lose clears constantly, because the actual failure state is a one-shot debuff at zero sanity, not a slow death. The mechanic rewards tight loops: enter, clear two anchor rooms, exit. Players who try to "full clear" the Maze in one night almost always wipe near the end.
The Veil Maze Rewards: Ichor, Offerings, Sins, and What They're Actually For
The Veil Maze rewards are the entire reason the region exists, because every Ichor, Offering, and Sin that drops in the Maze feeds a separate vendor or enhancement system that the Glade cannot substitute. The loot table is wide, but the high-value drops are tightly clustered in elite kills and anchor-room clears, so the optimal Maze route is built around which elites you can reliably reach before the night timer expires.
The Maze's reward profile is split across six distinct drop families — Ichor, Offerings, Sins, Fire Essence, socket Gems, and Epic gear — and each one feeds a different downstream system, so a single Maze run is rarely optimized for everything at once. Practical example: a player chasing Sins for the Hybrid combo unlock will weight their route toward named-room elites and skip most Offering Shrine clears, even though skipping the Shrine costs them the weekly vendor buff; the reverse is true for someone stockpiling Ichor for Enhancement bench upgrades. The table below breaks each reward down by drop source, primary use, and rarity tier so you can plan your run order around the resource your build actually needs.
| Reward | Drop Source | Primary Use | Rarity Tier |
|---|---|---|---|
| Ichor | Ichor Pools elites, Hiveling mobs | Enhancement bench in The Glade | Uncommon to Rare |
| Offerings | Offering Shrine clear, boss kills | Vendor row in The Glade, weekly buff | Rare to Epic |
| Sins | Elite kill streaks, named-room clears | Class trainer unlocks, Hybrid combos | Rare to Epic |
| Fire Essence (high tier) | Smelter Demon-area elites | Glade consumables, late-game crafting | Rare to Epic |
| Gems (Rare/Epic) | Random elite drops, Maze chest events | Gear socketing at Enhancement bench | Rare to Epic |
| Gear drops (Epic) | Boss kills, weekly Maze events | Direct equip or disenchant | Epic |
The drop rates are not officially published. The developer has not released exact percentages, and the community has no consistent dataset, so any number you see on a wiki or YouTube video is an estimate from a small sample. The mechanic itself is stable — Ichor comes from Ichor Pools, Offerings come from the Shrine, Sins come from elite streaks — but the rate at which they drop varies with Prestige tier, server population, and patch version, so plan your build around the resource category, not the per-hour yield.
Why Sins Matter More Than They Look
Sins are the most under-valued Maze drop in the early game, because their primary use — unlocking Hybrid class combinations at the class trainer — does not pay off until you have a second class at usable level. Once you hit Prestige 5, however, Sins become the gating currency for every Hybrid combo, and players who skipped Sin farming in the early Prestige tiers find themselves stuck rerunning the Maze at Prestige 10+ to catch up.
The community-tested recommendation is to spend Offerings on the weekly buff, bank Ichor for enhancement bursts, and burn Sins on Hybrid unlocks as soon as the trainer allows it. Holding Sins "for later" is the most common Maze-reward mistake, because the trainer's Hybrid unlock cost scales with your current Prestige, not with your total Sin count.
The Veil How to Get to The Pale: Story Gate, Primordial Era, and the Final Push
The Veil how to get to the Pale question is the one that defines the late game, because The Pale is locked behind a story push that most players only reach after their 10th or 15th Prestige milestone. The Pale is not a higher-difficulty version of The Maze — it is a different region with a different modifier stack, and the Primordial Era tag means enemies hit harder, elites spawn in named groups, and the sanity mechanic behaves differently than it does in The Maze.
The Pale's entry conditions, as confirmed by community research, hinge on a layered gate stack rather than a single quest completion: the Pale Obelisk activation prompt, the Primordial Era story flag, and a hard Prestige 10 floor, with Prestige 15 recommended to clear the Epic-tier gear check in The Glade.
| Condition | Requirement | How to Verify |
|---|---|---|
| Prestige tier | Reach Prestige 10 at minimum, 15 recommended | Check prestige counter in character sheet |
| Story flag | Complete the Primordial Era intro chain | Look for the Pale Obelisk activation prompt |
| Pale Obelisk | Activate the Pale Obelisk from the fast-travel menu | Obelisk appears greyed-out until story flag clears |
| Gear floor | Approximate Epic-tier baseline | Enhancement bench in The Glade, use Ichor stock |
| Class kit | Hybrid class strongly recommended | Class trainer in The Glade |
The story push is the real gate. The Pale Obelisk physically exists on the map, and you can see it from the fast-travel menu long before you can activate it, which leads many players to assume the Obelisk is bugged. It is not — the Obelisk is locked behind the story flag, and the flag is part of a multi-step chain that the developer has not published in a checklist form.
The community-tested path to The Pale is to push Prestige milestones (5th, 10th, 15th, 20th) in order, because each milestone unlocks a slice of the Primordial Era chain. The 5th milestone opens the first Pale teaser, the 10th unlocks the Pale Obelisk activation prompt, and the 15th gives you the gear floor to survive the first Pale clear. Skipping milestones does not speed up the unlock — the story flag checks your current Prestige, not your total earned Prestige.
What Changes Once You Reach The Pale
The Pale is a Primordial Era anomaly zone, which means the enemies there are tuned to a different stat budget than The Maze's. According to community testing, elites in The Pale hit roughly twice as hard as Maze elites at equivalent gear, but they also drop a higher density of Mythic-tier materials, which is the only reliable way to push your gear into the Mythic rarity band.
The Pale is also where the documented 12-boss roster becomes unavoidable. The Maze lets you skip most named bosses if you route around their rooms; The Pale places them as encounter gates between Obelisk checkpoints. The Veil's world map overview sketches out which Pale rooms anchor which bosses, and the community has settled on a recommended clear order that minimizes backtracking.
The Veil Pale Guide: Endgame Routes, Boss Order, and Mythic Loot
The Veil Pale guide comes down to two questions: which boss do you clear first, and which Mythic material are you farming. The Pale is small enough that the answer to both questions is usually the same — clear the boss closest to your spawn Obelisk, then chain to the next anchor room in a clockwise loop. The reason the loop works is that Pale elites do not respawn during a single clear, so a clean clockwise route is also the safest route.
A community-tested Pale clear order is below. The route assumes you spawn at the Pale Obelisk Vestibule — the only fixed entry tile — and the seven steps follow the room layout's clockwise geometry so elites between the Crowned Nothing Arena, Masquerade Hall, and Festering Wound Atrium stay cleared. Token drops are weighted toward whichever boss you kill second in the chain, which is why most groups open the Crowned Nothing first to lock the Mythic weapon token before the instance population spike hits the Glade vendor turn-in.
| Step | Pale Anchor Room | Boss / Encounter | Primary Drop |
|---|---|---|---|
| 1 | Pale Obelisk Vestibule | Trash clear, no boss | Starter Mythic materials |
| 2 | Crowned Nothing Arena | The Crowned Nothing | Mythic weapon token |
| 3 | Masquerade Hall | The Masquerade | Mythic armor token |
| 4 | Festering Wound Atrium | The Festering Wound | Ichor (high tier), Sin burst |
| 5 | Cell of Life Sanctum | The Cell of Life | Race-locked crafting material |
| 6 | Unfinished Vault | The Unfinished | Mythic accessory token |
| 7 | Return to Vestibule | Extract | Vendor turn-in |
The boss order is not officially published, and the developer has not confirmed a canonical clear sequence, so treat this as a community-tested route rather than a developer-recommended one. The reason this order works in practice is that each boss's arena is roughly equidistant from the next, the elites between arenas do not re-aggro on a clean clear, and the return-to-vestibule path is the shortest possible extract.
The Pale's reward profile is the only place in the game where Mythic drops are reliable. The Glade vendors do not sell Mythic materials, The Maze drops Epic at best, and the only other Mythic source is the weekly Maze event chest. The Pale is the Mythic economy, and every minute you spend there is a minute of progress on your gear floor.
Race-Locked Crafting in The Pale
The Cell of Life drops a race-locked crafting material, which means the material is usable only by characters of a specific race (one of the 10 documented: Human, Goblin, Skeleton, Hiveling, Wraith, Mushling, Veilborn, Gemhead, Obelite, Underling). The community has not published a full race-to-material mapping, and the developer has not released a crafting recipe sheet, so the safest play is to clear The Cell of Life on a character of the race you intend to main and bank the material until a recipe becomes available.
Frequently Asked Questions
How many locations are in The Veil all locations?
The Veil all locations consist of three named regions: The Glade (surface hub), The Maze (night-only dungeon), and The Pale (Primordial Era endgame zone). Each region has multiple anchor rooms and Obelisk checkpoints, but the three-region split is the top-level structure that the rest of the world map hangs off.
How do I get into the maze in The Veil?
The Maze opens only during the in-game night cycle, and the entry point is the Maze Obelisk after it has been activated. Wait for night, fast-travel to the Maze Obelisk, cross the threshold before the night timer expires, and watch your sanity bar rather than your health bar.
What rewards drop in The Veil maze map?
The Maze drops Ichor (for Enhancement), Offerings (for the weekly Shrine buff and Glade vendor turn-ins), Sins (for Hybrid class unlocks), high-tier Fire Essence, Rare/Epic Gems, and Epic gear from boss kills. Drop rates are not officially published, so plan your build around the resource category rather than per-hour yield.
How do I unlock The Veil Pale?
The Pale unlocks when you reach the 10th Prestige milestone at minimum (15th recommended), complete the Primordial Era intro story chain, and activate the Pale Obelisk from the fast-travel menu. The Pale Obelisk appears greyed-out until the story flag clears, so seeing the Obelisk is not the same as being able to use it.
Is The Pale harder than the Maze in The Veil all locations?
Yes. The Pale is the Primordial Era endgame zone with tougher elites, higher boss density, and a different sanity curve than The Maze. Elites hit roughly twice as hard at equivalent gear, but the trade-off is reliable Mythic-tier material drops that the Maze cannot match.